注意
转到末尾下载完整的示例代码。或通过 Binder 在浏览器中运行此示例
填充孔洞和查找峰值#
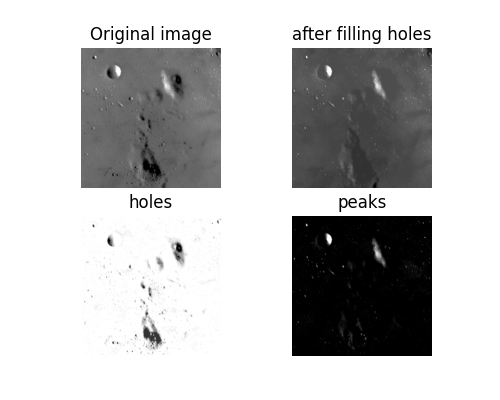
我们使用通过腐蚀进行的形态重建来填充图像中的孔洞(即孤立的暗点)。腐蚀会扩展种子图像的最小值,直到遇到掩模图像。因此,种子图像和掩模图像表示重建图像的最大和最小可能值。
我们从包含峰值和孔洞的图像开始
import matplotlib.pyplot as plt

from skimage import data
from skimage.exposure import rescale_intensity

image = data.moon()
# Rescale image intensity so that we can see dim features.
image = rescale_intensity(image, in_range=(50, 200))
现在我们需要创建种子图像,其中最小值表示腐蚀的起始点。为了填充孔洞,我们将种子图像初始化为原始图像的最大值。但是,沿着边界,我们使用图像的原始值。这些边界像素将是腐蚀过程的起始点。然后,我们通过将掩模设置为原始图像的值来限制腐蚀。
如上所示,从边缘向内腐蚀会消除孔洞,因为(根据定义)孔洞被较亮值的像素包围。最后,我们可以通过从原始图像中减去重建的图像来隔离暗区。
或者,我们可以使用通过膨胀进行的形态重建来查找图像中的亮点。膨胀是腐蚀的逆运算,会扩展种子图像的最大值,直到遇到掩模图像。由于这是一个逆运算,我们将种子图像初始化为最小图像强度,而不是最大值。其余过程相同。
seed = np.copy(image)
seed[1:-1, 1:-1] = image.min()
rec = reconstruction(seed, mask, method='dilation')

fig, ax = plt.subplots(2, 2, figsize=(5, 4), sharex=True, sharey=True)
ax = ax.ravel()

ax[0].imshow(image, cmap='gray')
ax[0].set_title('Original image')
ax[0].axis('off')

ax[1].imshow(filled, cmap='gray')
ax[1].set_title('after filling holes')
ax[1].axis('off')

ax[2].imshow(image - filled, cmap='gray')
ax[2].set_title('holes')
ax[2].axis('off')

ax[3].imshow(image - rec, cmap='gray')
ax[3].set_title('peaks')
ax[3].axis('off')
plt.show()

脚本的总运行时间: (0 分 0.461 秒)
