注意
转到结尾下载完整的示例代码。或通过 Binder 在浏览器中运行此示例
漩涡#
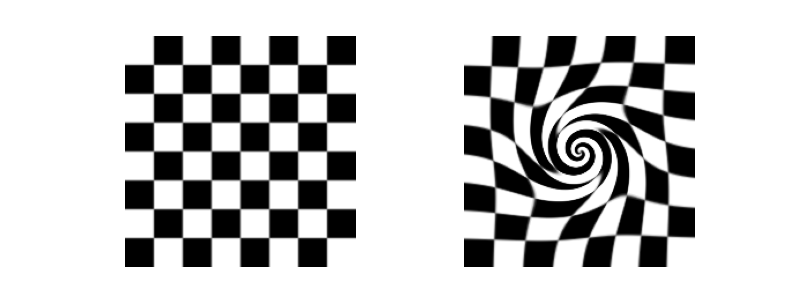
图像漩涡是一种非线性图像变形,可产生漩涡效果。此示例描述了 skimage 中此变换的实现,以及底层的扭曲机制。
图像扭曲#
在图像上应用几何变换时,我们通常使用反向映射,即对于输出图像中的每个像素,我们计算其在输入中的对应位置。原因是,如果我们以另一种方式进行操作(将每个输入像素映射到其新的输出位置),则输出中的某些像素可能会留空。另一方面,每个输出坐标在输入图像中(或在外部)都只有一个对应的位置,即使该位置不是整数,我们也可以使用插值来计算相应的图像值。
执行反向映射#
要在 skimage 中执行几何扭曲,您只需将反向映射提供给 skimage.transform.warp() 函数。例如,考虑这样一种情况,我们希望将图像向左移动 50 个像素。这种移动的反向映射将是
def shift_left(xy):
    xy[:, 0] += 50
    return xy
对 warp 的相应调用是
from skimage.transform import warp
warp(image, shift_left)
漩涡变换#
考虑输出图像中的坐标 \((x, y)\)。漩涡变换的反向映射首先计算相对于中心 \((x_0, y_0)\) 的极坐标,
\[ \begin{align}\begin{aligned}\theta = \arctan((y-y0)/(x-x0))\\\rho = \sqrt{(x - x_0)^2 + (y - y_0)^2},\end{aligned}\end{align} \]
然后根据以下公式对其进行变换
\[ \begin{align}\begin{aligned}r = \ln(2) \, \mathtt{radius} / 5\\\phi = \mathtt{rotation}\\s = \mathtt{strength}\\\theta' = \phi + s \, e^{-\rho / r} + \theta\end{aligned}\end{align} \]
其中 radius 指示漩涡的像素范围,rotation 添加旋转角度,strength 是漩涡量的参数。radius 到 \(r\) 的转换是为了确保变换在指定半径内衰减到 \(\approx 1/1000^{\mathsf{th}}\)。

import matplotlib.pyplot as plt

from skimage import data
from skimage.transform import swirl


image = data.checkerboard()
swirled = swirl(image, rotation=0, strength=10, radius=120)

fig, (ax0, ax1) = plt.subplots(
    nrows=1, ncols=2, figsize=(8, 3), sharex=True, sharey=True
)

ax0.imshow(image, cmap=plt.cm.gray)
ax0.axis('off')
ax1.imshow(swirled, cmap=plt.cm.gray)
ax1.axis('off')

plt.show()
脚本的总运行时间:(0 分钟 0.132 秒)
