注意
转到结尾下载完整的示例代码。或通过 Binder 在浏览器中运行此示例
应用 maskSLIC 与 SLIC#
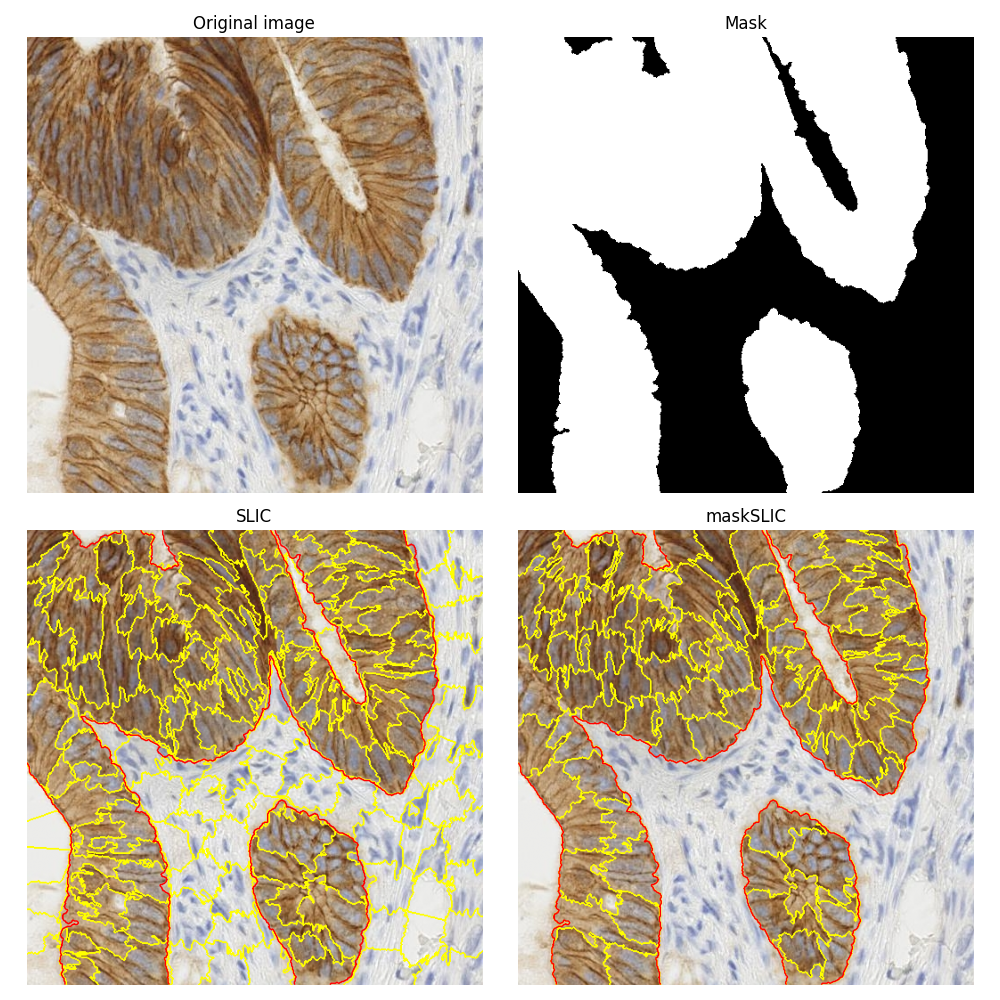
本例比较使用普通 SLIC 方法 [1] 和其掩模版本 maskSLIC [2] 获得的分割结果。
为了说明这些分割方法,我们使用一张带有免疫组织化学 (IHC) 染色的生物组织图像。在关于如何分离免疫组织化学染色中的颜色的示例中使用了相同的生物医学图像。
maskSLIC 方法是 SLIC 方法的扩展,用于在感兴趣区域中生成超像素。maskSLIC 能够克服影响 SLIC 方法的边界问题,特别是在不规则掩模的情况下。

import matplotlib.pyplot as plt

from skimage import data
from skimage import color
from skimage import morphology
from skimage import segmentation

# Input data
img = data.immunohistochemistry()

# Compute a mask
lum = color.rgb2gray(img)
mask = morphology.remove_small_holes(
    morphology.remove_small_objects(lum < 0.7, 500), 500
)

mask = morphology.opening(mask, morphology.disk(3))

# SLIC result
slic = segmentation.slic(img, n_segments=200, start_label=1)

# maskSLIC result
m_slic = segmentation.slic(img, n_segments=100, mask=mask, start_label=1)

# Display result
fig, ax_arr = plt.subplots(2, 2, sharex=True, sharey=True, figsize=(10, 10))
ax1, ax2, ax3, ax4 = ax_arr.ravel()

ax1.imshow(img)
ax1.set_title('Original image')

ax2.imshow(mask, cmap='gray')
ax2.set_title('Mask')

ax3.imshow(segmentation.mark_boundaries(img, slic))
ax3.contour(mask, colors='red', linewidths=1)
ax3.set_title('SLIC')

ax4.imshow(segmentation.mark_boundaries(img, m_slic))
ax4.contour(mask, colors='red', linewidths=1)
ax4.set_title('maskSLIC')

for ax in ax_arr.ravel():
    ax.set_axis_off()

plt.tight_layout()
plt.show()
脚本的总运行时间:(0 分钟 2.356 秒)
